Admin Guide
Ready to set up CoinDirect for your business? Here’s your quick-start guide to getting it done effortlessly:
Contents
- Register with MetaMask
- Create a Coin Group
- Create a Checkout
- Embed the Shortcode
- See Transaction History
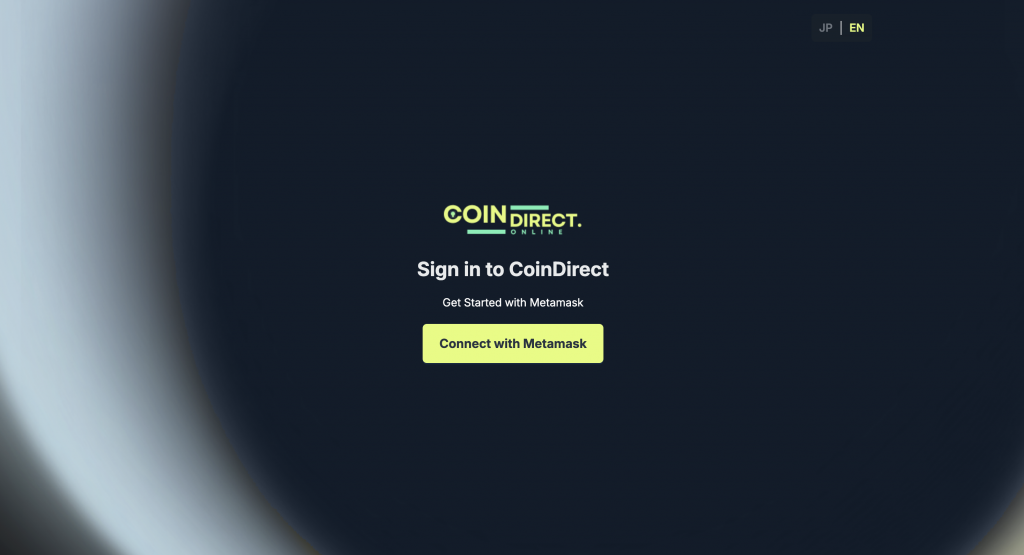
1. Register with MetaMask
Connect your MetaMask wallet to create an account.
No tedious tasks like entering business information are required during this process.
2. Create a Coin Group
Before setting up a checkout, register a coin group.
A coin group is a collection of cryptocurrencies that you accept as payment.
You select one coin group per checkout, and the cryptocurrencies included in that group can be used for payment.

- Navigate to Coin Group > “+ Add New” to create a coin group.
- Enter a name for your coin group.
- Select a blockchain network and freely configure the cashback rate and tokens (cryptocurrencies) you wish to include.
- Click “Save” in the top-right corner to complete the setup.
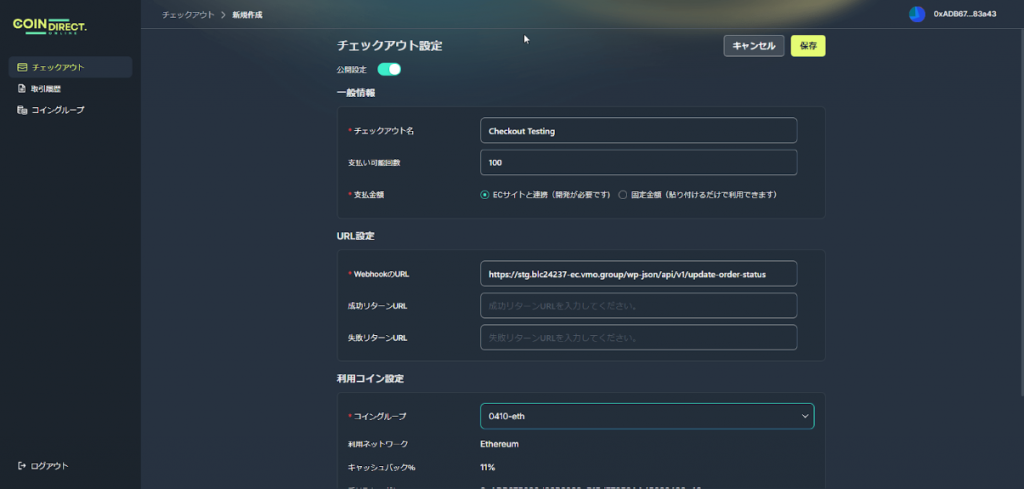
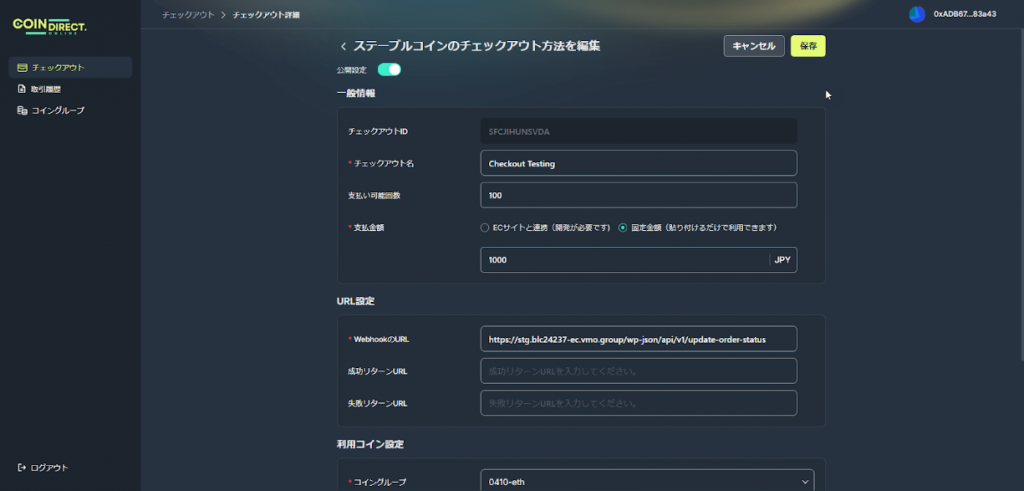
3. Create a Checkout
A checkout is the mechanism that facilitates payments.
It supports both variable amounts based on products on your e-commerce site and fixed payment amounts.
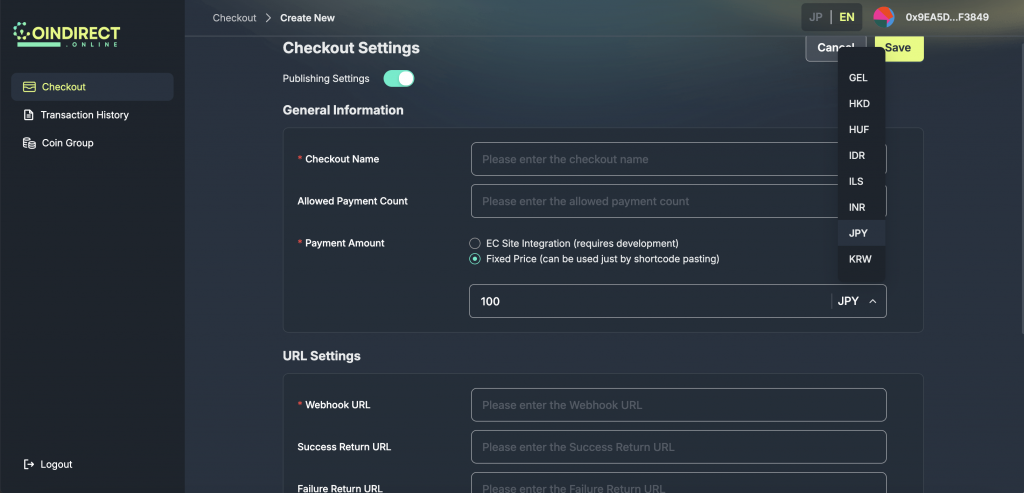
- Navigate to Checkout > “+ Create New” to create a checkout.
- Enter a name for your checkout. Setting the number of allowed payment attempts is optional.
- If you want a checkout that varies the payment amount based on e-commerce products, select “EC Site Integration (requires development)”. For fixed-amount checkouts, select “Fixed Price (can be used just by shortcode pasting)”.
- If you select “EC Site Integration”, please be careful not to choose the wrong currency.
- If you select “Fixed Price”, please set the currency and amount.
- Configure the Webhook URL. If you want to redirect users to specific pages based on payment success or failure, set the Success Return URL and Failure Return URL.
- Choose the coin group to be used for this checkout.
- Click “Save” in the top-right corner to finish.
4. Embed the Shortcode
Refer to the appropriate instructions depending on whether your checkout uses variable or fixed payment amounts.
For Variable Amount Checkout
Creating a checkout for variable amounts generally requires development. However, customers using BOOKINGX Portal can easily implement payments for variable amounts. For more details, please check the link below.
BOOKINGX Portal:
https://portal.bookingx.io/#/
1. Confirm that the checkout you want to implement is already switched to the ‘EC Site Integration’ option.
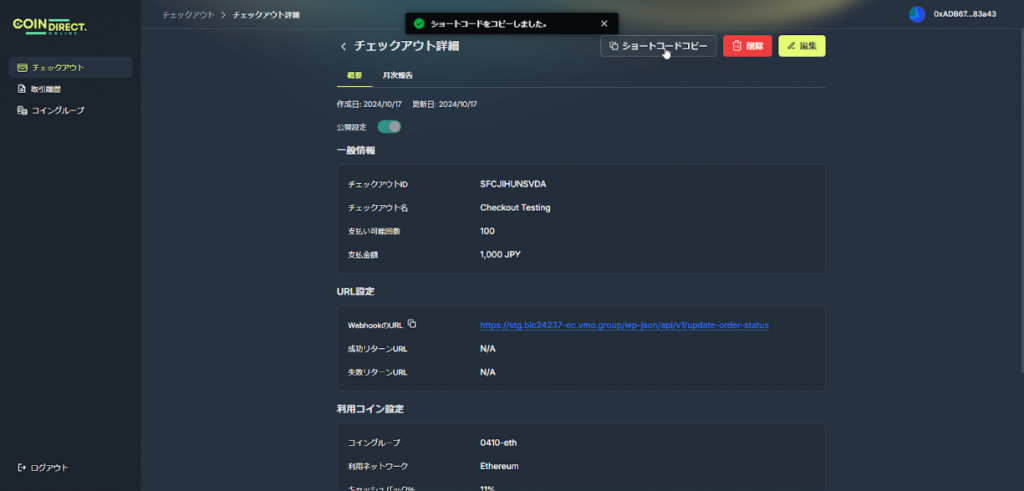
2. On the Checkout List, click the three-dot menu on the right of the checkout you want to use -> select ‘Copy Shortcode’.
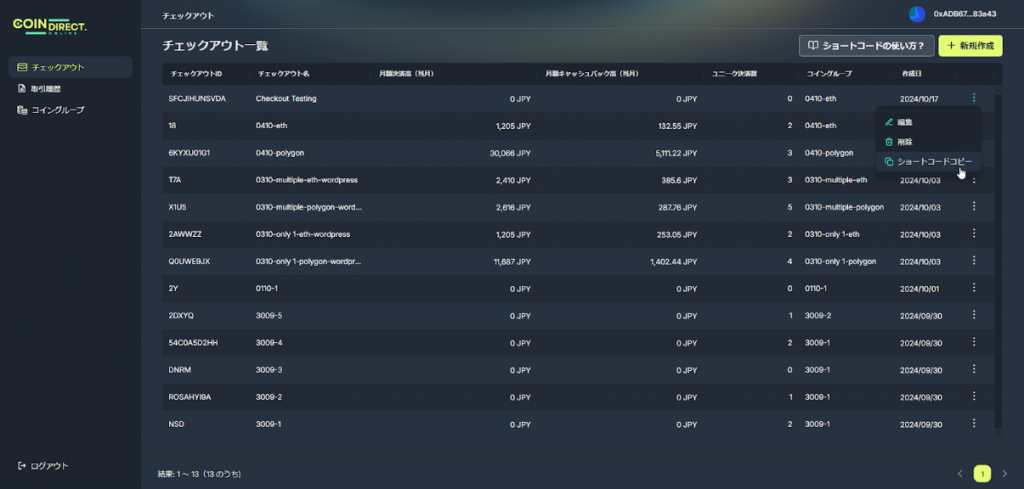
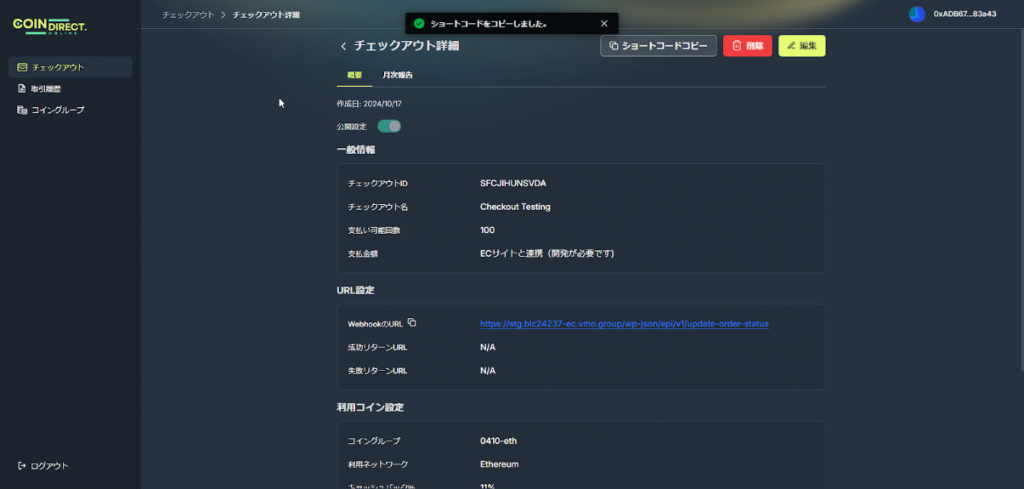
You can also copy the shortcode on the selected checkout’s detail page.
3. Access and open the functions.php file of the WordPress template you’re using (Path: WordPress Admin Site -> Appearance -> Theme File Editor) and paste the copied shortcode.
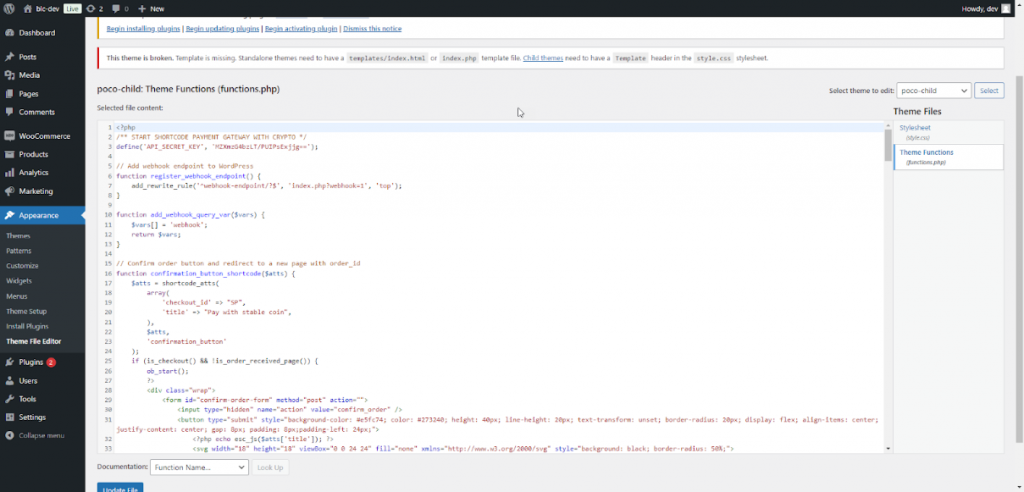
4. Add a shortcode block where you want to display the CoinDirect checkout button, and paste the following shortcode [custom_bcl_payment checkoutID=”{checkout ID}”].
Example: [custom_bcl_payment checkoutID=”SFCJIHUNSVDA”]
![4. Add a shortcode block where you want to display the CoinDirect checkout button, and paste the following shortcode [custom_bcl_payment checkoutID="{checkout ID}"].](https://coindirect.online/wp-content/uploads/2024/11/EC連携画像4-1024x489.png)
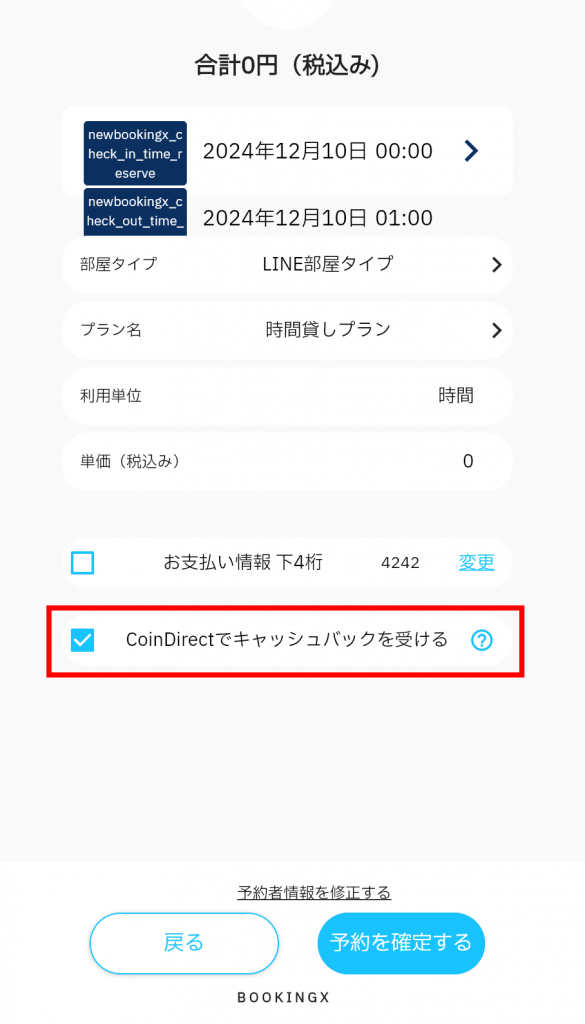
Your WordPress website will display like this.
For Fixed Amount Checkout
1. Confirm that the checkout you want to implement is already switched to the ‘Fixed Price’ option.
2. On the Checkout List, click the three-dot menu on the right of the checkout you want to use -> select ‘Copy Shortcode’.
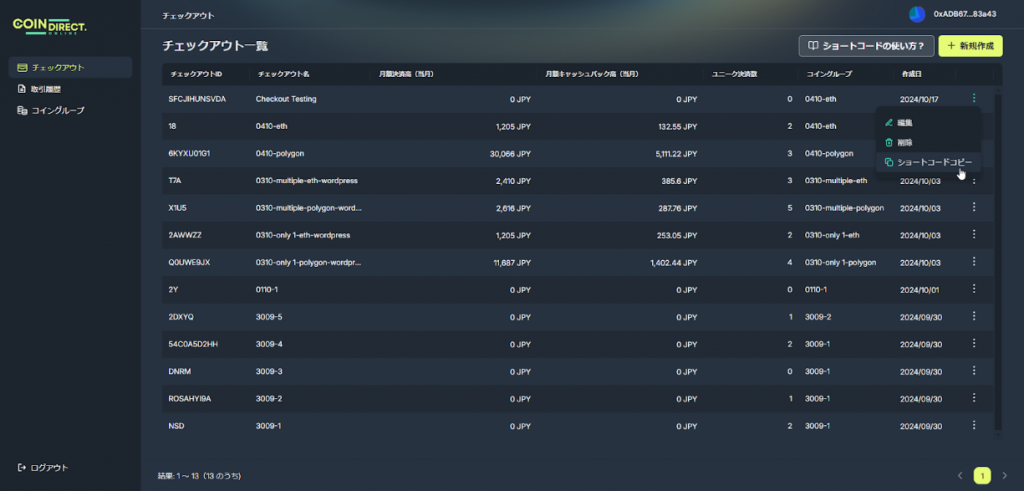
You can also copy the shortcode on the selected checkout’s detail page.
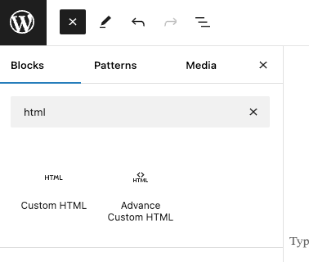
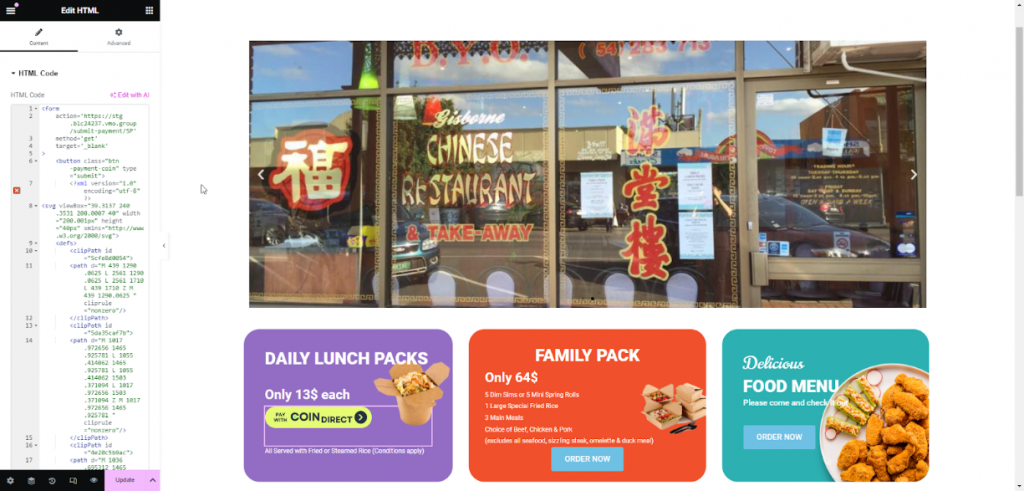
3. Move to the website where you want to implement the copied shortcode.
Insert an HTML block into the website’s HTML editor and paste the copied shortcode.
Your website will display like below.
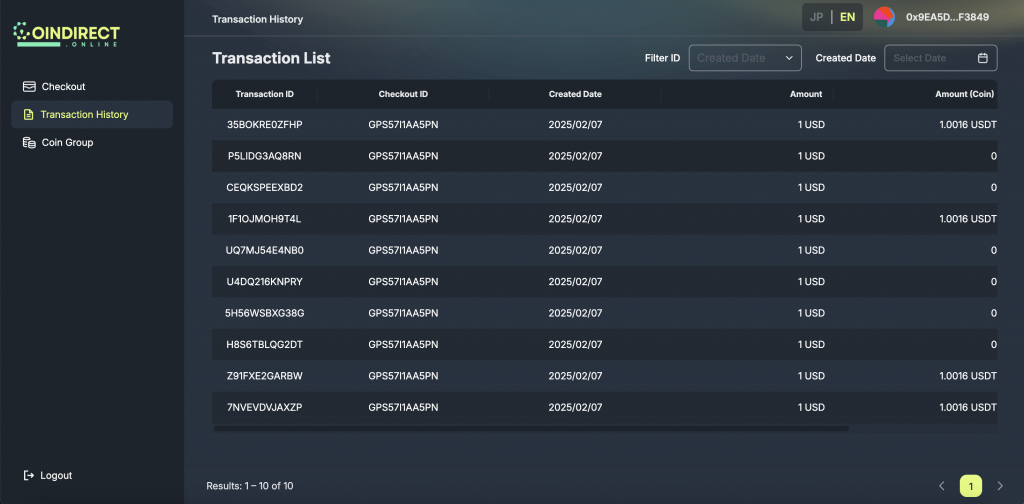
5. See Transaction History
You can view past transaction history from the “Transaction History” tab. The payment amount for each transaction is displayed in the amount and currency selected at checkout.
If you have any questions or encounter issues, feel free to reach out to us in the official community!